How to Fix io.netty.channel.AbstractChannel$AnnotatedConnectException Minecraft Error?
The primary reason behind this error is IP connectivity issue which has been explained below, along with the secondary reasons for the same.
How to Fix io.netty.channel.AbstractChannel$AnnotatedConnectException Minecraft Error? Method 1: Reset Internet Router Method 2: Restart Your Computer Method 3: Resolve Conflicts with VPN Method 4: Ensure Correct IP Address and Port Method 5: Update Java Software Method 6: Uninstall Incompatible Software Method 7: Add Exceptions to Firewall Settings in Minecraft Folder Method 8: Disable Windows Firewall Temporarily (Not Recommended) Method 9: Check Port Filtering Feature Method 10: Check ISP Network Access Method 11: Reinstall Minecraft
IP Connectivity Issue: When you try to connect to the game server and the IP address and/or IP port is incorrect, it will cause io.netty.channel.AbstractChannel$AnnotatedConnectException error in Minecraft. Conflicts arise when IP address change and multiple users try connecting with the same IP address. This error would be negligible if you use a static IP address, instead. Windows Firewall: Windows Firewall is an in-built application that acts as a filter i.e it scans the information on the internet and blocks the potentially harmful data from reaching the system. Since Windows Firewall is known to cause problems with the functioning of trustworthy applications as well. That is why Minecraft might be unable to connect to its server and cause Connection Timed Out No Further Information Error and cause Connection Timed Out No Further Information Error. Outdated Java Files: Since Minecraft is based on Java programming, outdated Java files and game Launcher will lead to io.netty.channel.AbstractChannel$AnnotatedConnectException error. The only solution is to update the game files regularly. Software Incompatibility: The official website of Minecraft hosts a list of software that is incompatible with it. Click here to read the complete list. You will need to uninstall all these programs from your system to avoid issues with the game, altogether. Unavailability of the Port: Online data is communicated in packets from the sender port to the destination port. Under normal circumstances, the above function works efficiently. But, in the case of multiple connection requests, they are queued and take longer than usual. The unavailability of port or port is available but busy will trigger connection refused: no further information Minecraft error. The only solution is to try connecting to the server after a few minutes.
In this section, we have compiled a list of methods to fix this error and arranged them according to user convenience. So, implement these, one by one, until you find a solution for your Windows 10 system.
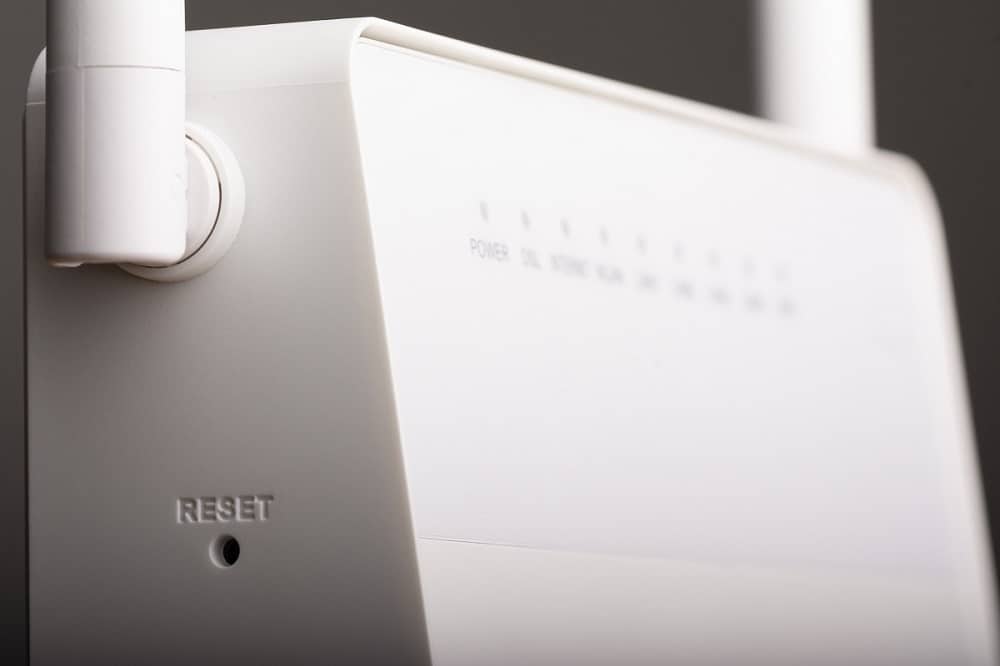
Method 1: Reset Internet Router
Simply, resetting your internet router can fix io.netty.channel.AbstractChannel$AnnotatedConnectException error.
- Unplug the router from the Power outlet.
- Wait for a while and then, reconnect the router.
- Check if the error is fixed now. Else, press the Reset button of the router to reset all settings.
Method 2: Restart Your Computer
Most minor technical glitches often get fixed when you go for a restart or reboot process.
- Navigate to the Start menu by pressing the Windows key.
- Click Power icon > Restart, as highlighted.
If the basic troubleshooting methods couldn’t fix io.netty.channel.AbstractChannel$AnnotatedConnectException error in Minecraft, we shall now fix conflicts with VPN in the succeeding method. Also Read: What is VPN? How it Works?
Method 3: Resolve Conflicts with VPN
Method 3A: Uninstall VPN Client Since a VPN client masks your IP address, it may also trigger the said error. Hence, uninstalling the VPN client might help fix io.netty.channel.AbstractChannel$AnnotatedConnectException error in Minecraft To remove all the data and files associated with the VPN client in one go, we have used Revo Uninstaller in this method.
Install Revo Uninstaller from the official website by downloading FREE TRIAL or BUY, as depicted below.
Open Revo Uninstaller and navigate to your VPN Client.
Now, select the VPN Client and click on Uninstall from the top menu bar. Note: We have used Discord as an example to illustrate the steps for this method.
Check the box next to Make a System Restore Point before uninstall and click Continue in the pop-up prompt.
Now, click on Scan to display all the VPN files left in the registry.
Next, click on Select all followed by Delete.
Click on Yes in the confirmation prompt.
Make sure that all VPN files have been deleted by repeating Step 5. A prompt stating Revo uninstaller hasn’t found any leftover items should be displayed as depicted below.
Restart the system after the VPN client and all its files have been deleted completely. Method 3B: Use a Trusted VPN Client As informed earlier, the primary reason is the IP connectivity issue and thus, using a trusted VPN client to run the game is extremely important. If you still wish to employ a VPN service, a few recommended ones are listed below:
ExpressVPN: It is Minecraft tested VPN service that ranks #1 in our list.
SurfShark: This VPN is user-friendly and cost-effective.
Betternet: It offers a reliable VPN service, free of cost.
NordVPN: It is well suited for this sandbox game and provides quality service.
VPNCity: It is the leading Military-Grade VPN service that can be utilized on iOS, Android, and macOS devices. This provides a super-fast streaming facility. Hence, you can avoid this connection error by using a reliable VPN client after uninstalling the existing VPN client.
Method 4: Ensure Correct IP Address and Port
If you utilize a dynamic internet service, your IP address changes every few days. Therefore, it becomes imperative to ensure the correct IP address and port are added to the Launcher. Follow the below-mentioned steps to do so:
Type cmd in the Windows search bar. Click on Run as administrator to launch Command Prompt with administrative privileges.
Type: ipconfig and hit Enter, as depicted.
Note down the IPV4 Address displayed on the screen.
Navigate to Minecraft Servers folder > Maxwell (some random numbers) folder.
Now, go to MinecraftServer.
Here, click on Server Properties (.txt file) to open it. Note down the Server Port address from here.
Next, launch Minecraft and go to the Play Multiplayer option.
Click on the Server you want to join and then, click Edit, as highlighted.
The IPV4 address and the Server Port number should match the data noted in Step 4 and Step 8. Note: The Server name may vary according to user preferences.
Finally, click on Done > Refresh. Check if this could fix io.netty.channel.AbstractChannel$AnnotatedConnectException error in Minecraft. If not, try the next fix. Also Read: 14 Ways to Lower Your Ping and Improve Online Gaming
Method 5: Update Java Software
When you use the game Launcher in its latest version while Java files are outdated, a major conflict arises. This may lead to Connection refused: no further information error in Minecraft as well as Minecraft login error. as well as Minecraft login error..
Windows 10 users often experience a standard Java.net.connectexception connection timed out no further information error. Also, to join the Minecraft server, a Learn to Mod account is essential. A common error that indicates the absence of Learn to Mod account is: Java.net connectexception Minecraft error
Both these errors can be rectified by updating your Java software to the latest version, as instructed below:
Launch Configure Java app by searching for it in the Windows Search bar, as shown.
Switch to the Update tab in the Java Control Panel window.
Tick the box next to the Check for Updates Automatically option.
From the Notify Me drop-down, select Before Downloading option, as depicted. Here onwards, Java will automatically look for updates and will notify you before downloading those.
Now, click on the Update Now button.
If a new version of Java is available, then begin the downloading and installation process by following the on-screen instructions.
Allow Java Updater to make changes to your computer.
Follow the prompts to complete the process.
Method 6: Uninstall Incompatible Software
As discussed earlier, there’s a list of incompatible software available on the Minecraft website. To resolve such issues, you need to uninstall conflicting software from your system. Method 6A: Uninstall Incompatible Programs
Type apps in the Windows Search box to launch Apps & Features utility.
Use the Search this list field to locate these incompatible Programs.
Select Program and click on Uninstall, as shown below. Note: We have used 3D Builder for illustration purposes only.
Method 6B: Uninstall Game Enhancement Software Minecraft does not need any game enhancer software. Yet, if you utilize game enhancer applications on your system, it may lead to io.netty.channel.AbstractChannel$AnnotatedConnectException error in Minecraft. Moreover, it may lead to game crashes and hardware problems. Hence it is advisable to delete such programs. Note: We have explained the steps for this method by using NVIDIA GeForce Experience as an example.
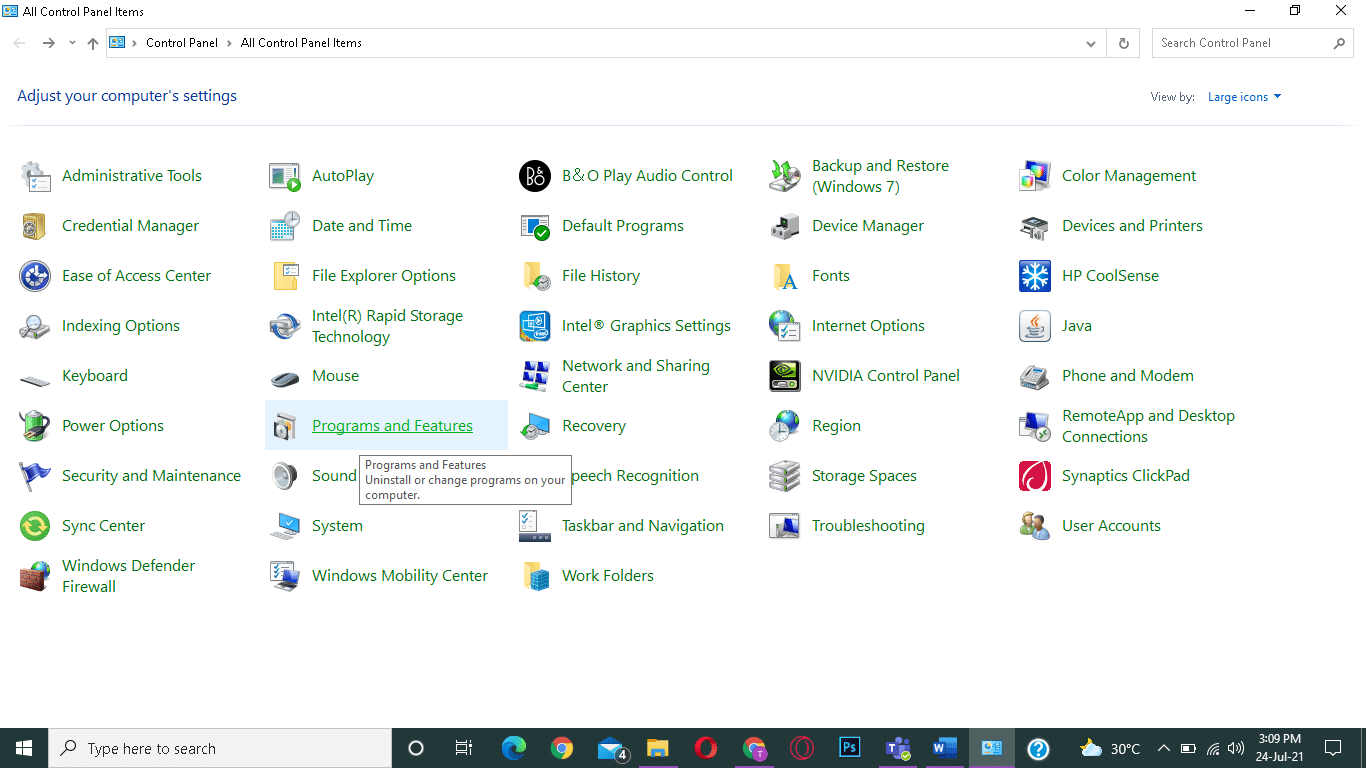
Launch Control Panel by searching for it in the Windows search bar.
Click on View by > Large icons.
Select Programs and Features as depicted below.
Right-click any NVIDIA component and select Uninstall.
Repeat the same process for all NVIDIA programs to uninstall these from your system. and Restart your computer. You can use the same method to delete all game-enhancing software from your system e.g Discord, Evolve, Synapse/Razer Cortex, D3DGear, etc. Also Read: 5 Ways to Completely Uninstall Avast Antivirus in Windows 10
Method 7: Add Exceptions to Firewall Settings in Minecraft Folder
Windows Firewall sometimes makes it difficult for the game to be connected to the host server. Making exceptions to Firewall settings for Minecraft will help you fix connection refused: no further information or Failed to Authenticate Your Connection Minecraft error. Here’s how to add Minecraft folder exceptions to Firewall settings:
Click on the Windows icon and select the Settings option, as shown.
Open Update & Security by clicking on it.
Select the Windows Security option from the left pane and click on Firewall & network protection in the right pane.
Here, click on Allow an app through firewall.
Now, click on Change settings. Also, click on Yes in the confirmation prompt.
Click on Allow another app option located at the bottom of the screen.
Select Browse…, go to Game Installation Directory and select Launcher Executable. Then, click the Add button from the bottom of the screen.
Repeat steps 6 and 7 to add the directory where the Minecraft servers, Maxwell folder, and Java executables are installed.
Go back to the Allow apps screen in Step 5.
Scroll down to the Java Platform SE Binary option and tick all the options for both Public and Private Networks.
Method 8: Disable Windows Firewall Temporarily (Not Recommended)
This is an alternative to the above method of adding exceptions to the Firewall. Here, we shall disable Windows Defender Firewall temporarily, to fix io.netty.channel.AbstractChannel$AnnotatedConnectException in Minecraft.
Launch the Control Panel as you did before.
Select the System and Security option.
Here, click on Windows Defender Firewall, as shown.
Click the Turn Windows Defender Firewall on or off option from the left panel.
Now, check the boxes; turn off Windows Defender Firewall (not recommended) for all types of network settings.
Reboot your system and check if the issue is fixed now.
Method 9: Check Port Filtering Feature
Even though port forwarding is working fine on your system, the port filtering feature may create a conflict. Let us first understand what these terms mean.
Port Filtering is an action that permits you to allow or block specific ports that are performing a particular operation. Port Forwarding is a process through which external devices can be connected to private networks by connecting the external port to the internal IP address and port of the device.
You can solve this conflict in the following ways:
- Ensure the port filtering option is turned off.
- If it is turned on, ensure that the correct ports are being filtered. Also Read: 4 Ways to Check FPS (Frames Per Second) In Games
Method 10: Check ISP Network Access
In addition, you should verify whether your Internet Service Provider (ISP) works efficiently or not. Your ISP might block network access to particular domains, which is why you are also unable to connect to the server. In this scenario, contact your Internet Service Provider with this problem. Moreover, you might be able to fix io.netty.channel.AbstractChannel$AnnotatedConnectException in Minecraft with a network update.
Method 11: Reinstall Minecraft
If none of the above-mentioned methods fix the said error on your Windows 10 system, then Minecraft must have gotten corrupt. The only way to get rid of this issue is to reinstall the application on your system.
- Follow the steps listed in Method 6A to uninstall Minecraft.
- Once Minecraft has been deleted from your system, you can confirm by searching for it, as depicted below. You will receive a message stating We couldn’t find anything to show here. Double-check your search criteria.
Here’s how to delete Minecraft cache and leftover files from your computer: 3. Click the Windows Search box and type %appdata%. Click on Open to go to the AppData Roaming folder
Here, locate Minecraft, right-click on it and Delete it.
Next, search for %LocalAppData% in the Windows Search box, as shown.
Delete the Minecraft folder by right-clicking on it.
Restart your system as all Minecraft files, including cache are deleted.
Download Minecraft launcher and follow the on-screen instructions to install it in your system: Pro Tip: You can also resolve game interruptions and connection refused no further information Minecraft Error by allotting additional RAM to Minecraft. Recommended:
Fix Minecraft Error Failed to Write Core Dump 10 Ways To Fix Minecraft Crashing Issues on Windows 10 How to Open Steam Games in Windowed Mode How to Fix Steam Not Downloading Games
We hope that this guide was helpful and you were able to fix io.netty.channel.AbstractChannel$AnnotatedConnectException: Connection refused Minecraft error in your Windows system. Let us know which method worked for you. Also, if you have any queries/comments regarding this article, then feel free to drop them in the comments section.


![]()