Windows 10 lets you simply change the settings of Feedback Frequency through privacy control in the Settings app. But in case you need to completely disable the Feedback Notification, you need to use registry tweak as Windows doesn’t provide any setting to disable Windows feedback Notifications. So without wasting any time let’s see How to Change Feedback Frequency in Windows 10 with the help of the below-listed tutorial.
How to Change Feedback Frequency in Windows 10
Make sure to create a restore point just in case something goes wrong.
How to Change Feedback Frequency in Windows 10 Method 1: Change Feedback Frequency in Windows 10 Settings Method 2: Enable or Disable Windows Feedback Notifications using Registry Method 3: Enable or Disable Windows Feedback Notifications in Group Policy Editor
Method 1: Change Feedback Frequency in Windows 10 Settings
1.Press Windows Key + I to open Settings then click on Privacy.
2.From the left-hand menu click on Diagnostics & feedback. 3.Now in right window pane scroll down to the bottom where you find Feedback frequency. 4.From the “Windows should ask for my feedback” drop-down select Always, Once a day, Once a week or Never according to your choice.
Note: Automatically (Recommended) is selected by default. 5.Once finished, you can close the settings and restart your PC.
Method 2: Enable or Disable Windows Feedback Notifications using Registry
1.Press Windows Key + R then type regedit and hit Enter to open Registry Editor.
2.Navigate to the following registry key: HKEY_LOCAL_MACHINE\SOFTWARE\Policies\Microsoft\Windows\DataCollection 3.Right-click on DataCollection then select New > DWORD (32-bit) Value.
4.Name this newly created DWORD as DoNotShowFeedbackNotifications and hit Enter.
5.Next, double-click on DoNotShowFeedbackNotifications DWORD and change its value according to: To Enable Windows Feedback Notifications: 0 To Disable Windows Feedback Notifications: 1
6.Click OK to save changes and close registry editor. 7.Reboot your PC to save changes.
Method 3: Enable or Disable Windows Feedback Notifications in Group Policy Editor
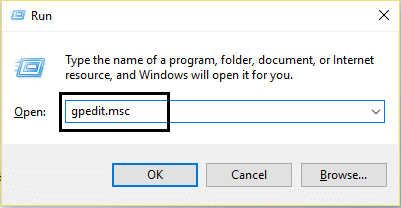
Note: This method won’t work for Windows 10 Home Edition, this will only work for Windows 10 Pro, Education, and Enterprise Edition. 1.Press Windows Key + R then type gpedit.msc and hit Enter to open Group Policy Editor.
2.Navigate to the following policy: Computer Configuration > Administrative Templates > Windows Components > Data Collection and Preview Builds 3.Make sure to select Data Collection and Preview Builds then in right window pane double-click on “Do not show feedback notifications” policy.
4.Change the setting of Do not show feedback notifications policy according to: To Enable Windows Feedback Notifications: Not Configured or Disabled To Disable Windows Feedback Notifications: Enabled
Note: Setting the above policy to enabled will set feedback frequency to Never and this can’t be changed using option one. 5.Click Apply followed by OK and close everything. 6.To save changes make sure to restart your PC. Recommended:
Enable or Disable Windows Error Reporting in Windows 10 Encrypt Files and Folders with Encrypting File System (EFS) in Windows 10 How to Clear All Event Logs in Event Viewer in Windows 10 Back Up Your EFS Certificate and Key in Windows 10
That’s it you have successfully learned How to Change Feedback Frequency in Windows 10 but if you still have any queries regarding this tutorial then feel free to ask them in the comment’s section.