The Microsoft Virtual Wifi Miniport adapter feature is new and comes disabled by default. So, before using it, you need to enable it, and then only you can create your own wireless access point. You can create a wireless access point using two methods.
How To Enable Microsoft Virtual WiFi Miniport Adapter
But before turning the Microsoft Virtual WiFi Miniport adapter into a wireless access point, the computer’s main network adapter needs to be allowed to share its internet connection with the devices that will connect to it through this virtual network adapter.
How To Enable Microsoft Virtual WiFi Miniport Adapter 1. Setup a Wireless Access Point using the Command Prompt 2. Setup a Wireless Access Point using Third-Party Software (Connectify) How to Reinstall Microsoft Virtual WiFi Miniport Adapter reinstallation
To do so, follow these steps:
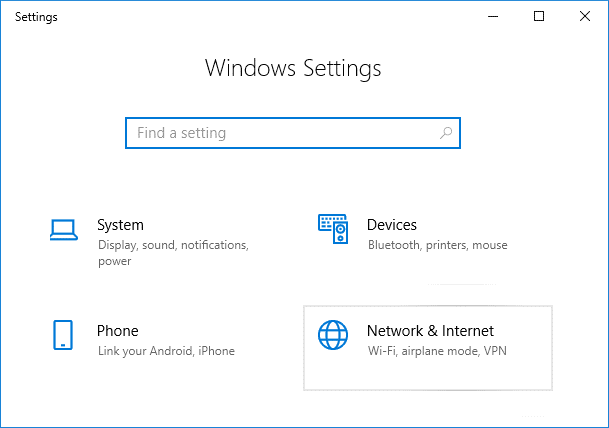
Press Windows Key + I to open Window Settings.
Under the settings, click on the Network & Internet option.
Scroll down and click on Network and Sharing Center.
Under the network and sharing center, click on Change adapter settings.
Right-click on the Ethernet connection.
Click on the Properties option from the menu that appears.
Click on the Sharing tab at the top of the dialogue box.
Under the Sharing tab, check the checkbox next to Allow other network users to connect through this computer’s Internet connection.
Click on the OK button.
After completing the above steps, your computer is ready to share its internet connection with the other devices that will connect to it through the Virtual Network Adapter. Now, you can create a wireless access point using any of the below two methods:
1. Setup a Wireless Access Point using the Command Prompt
To set up a wireless access point using the command prompt, follow these steps.
- First of all, connect your Windows computer to any network using the Ethernet connection. Note: You will not be able to create a Wi-Fi hotspot and Virtual Wireless Access Point if you are connected to an internet connection using the Wi-Fi.
- Now, check if you have a wireless network adapter installed on your Windows computer or not. You can check it on your Windows 10 PC using these steps: a. Press the Windows+X keys together.
b. Select the Network Connections option from the menu that appears.
c. The network & internet settings page will appear and you will see the list of all the installed network adapters there. d. If you have a Wireless Network Adapter installed on your computer, you will see it under the label Wi-Fi. If no Wireless Network Adapter is installed on your computer, you need to install it using the Ethernet/USB internet connection. 3. Once you have a wireless network adapter installed on your computer, open the command prompt. Note: Choose the Run as Administrator option from the menu that appears and click on Yes for the confirmation. The Administrator Command Prompt will open.
- Every wireless network adapter installed on your computer does not have support to create wireless access points or wireless networks. To check if the hosted wireless adapter provides the support to create a Wi-fi hotspot for your adapter, follow these steps: a. Enter the below command in the command prompt. netsh wlan show drivers
b. Hit the enter button to run the command.
c. If the hosted network supported Yes, you can create the wireless network using that existing adapter in the Windows operating system. 5. Now, in order to create a wireless access point on a virtual network adapter or to create a wireless hotspot, enter the below command in the Command Prompt: netsh wlan set hostednetwork mode=allow ssid =VirtualNetworkName key=Password 6. Replace VirtualNetworkName with any desired name for the wireless access point network and Password with a strong password for the wireless access point network. Hit the enter button to run the command. Note: All the wireless virtual access points are encrypted with WPA2-PSK (AES) encryption.
Once all the setup has been done, enter and run the below command in the command prompt to enable the wireless access point or Wi-fi hotspot. This access point will now be visible in the other user’s list of wireless networks. netsh wlan start hostednetwork
To see the details of this newly created wireless access point at any time, like how many clients are connected to that Wi-Fi hotspot, enter and run the below command in the command prompt. netsh wlan show hostednetwork
After completing the above steps, your Wireless Access Point or Wi-Fi hotspot will be ready and other users should be able to see it in their list of wireless networks available around them and they should be able to connect to it to access the internet connection. If you are an Android or iOS user, open your Wi-Fi, scan for the available networks, and you should be able to see the new wireless network available to connect. If you want to stop the newly created wireless network anytime, then enter and run the below command in the command prompt. The wireless network service will stop. netsh wlan stop hostednetwork
Also Read: Microsoft Virtual Wifi Miniport Adapter driver problem [SOLVED]
2. Setup a Wireless Access Point using Third-Party Software (Connectify)
There are so many third-party software available in the market that creates a wireless access point like the way the command prompt does. In fact, these third-party software provides a graphical interface to make this task easier. Some of these include Connectify, Baidu WiFi hotspot, Virtual Router Plus, and many more. Most of them are free while the others are paid. You just have to download, install, and follow the on-screen instructions to create a wireless access point or a Wi-Fi hotspot. To create a wireless access point or a Wi-Fi hotspot using Connectify, follow these steps:
First of all, download Connectify from its website.
Click on the Download button to start its downloading.
Open the downloaded .exe file.
Click on the Yes option for confirmation.
To continue, click on the I Agree button.
Again, click on the Agree option.
The software will start installing.
Click on Finish and your computer will restart.
After the computer restarts, open Connectify and start creating a wireless network. Also Read: Fix Laptop not connecting to WiFi
If there is any firewall configuration in your computer, then depending on it, you may be asked to allow and give permission(s) to Connectify to access the current network.
Select the current internet connection to share with the Connectify software.
Give a name to the Wi-Fi hotspot you are going to create under the Hotspot section.
Your Wi-Fi hotspot will be visible to anyone within the signal range and they can easily access the network. Now, it is important to secure the network created by providing a strong password. You can create a strong password under the Password section.
Now, click on the Start Hotspot option to create a wireless hotspot network.
After completing the above steps, your wireless access point or Wi-Fi hotspot will be ready and now anyone can access your internet for free who has the Wi-Fi hotspot password. If at any time, you want to stop a hotspot so that no other device can access your current network, click on the Stop Hotspot option on the Connectify software. Your Wi-Fi hotspot will be stopped immediately and all the connected devices will be disconnected.
How to Reinstall Microsoft Virtual WiFi Miniport Adapter reinstallation
By using the Microsoft Virtual Wi-Fi Miniport adapter, all the Windows users can share their internet/network with others wirelessly. Sometimes, the driver may get corrupted and you may find problems while creating the Wi-Fi hotspot service from your PC. To troubleshoot this problem, you will have to reinstall the driver software on your PC by following these steps.
Recommended:
11 Best IDEs For Node.js Developers Fix WiFi Network Not Showing Up on Windows 10
I hope the above steps were helpful and now you have a better understanding of Microsoft Virtual WiFi Miniport Adapter. And using the above steps you can enable the Microsoft Virtual WiFi Miniport Adapter on Windows PC.